
The first side quest in Chapter 3 of Draconic Echoes: The Ardent War is introduced to the player when he arrives at Clear Creek Village.
When the player arrives, the village is currently under attack by the “Bone Club Ogre Clan,” a band of monsters local to the area. During the fight, the player party hears an explosion and overhears some ogres boisterously talking about how some “dragon man” gave them some “boom-boom powder,” and that they need to be more careful. (As shown by the area in the red box, they had accidentally blown up some of the explosives early.) The mention of the “dragon man” tips the player off that the main antagonistic army is encouraging these ogres to attack the village.
After the player fends off the ogres, the party learns that the ogres came from a small mountain to the west and need to head up if the player wishes to continue the quest.
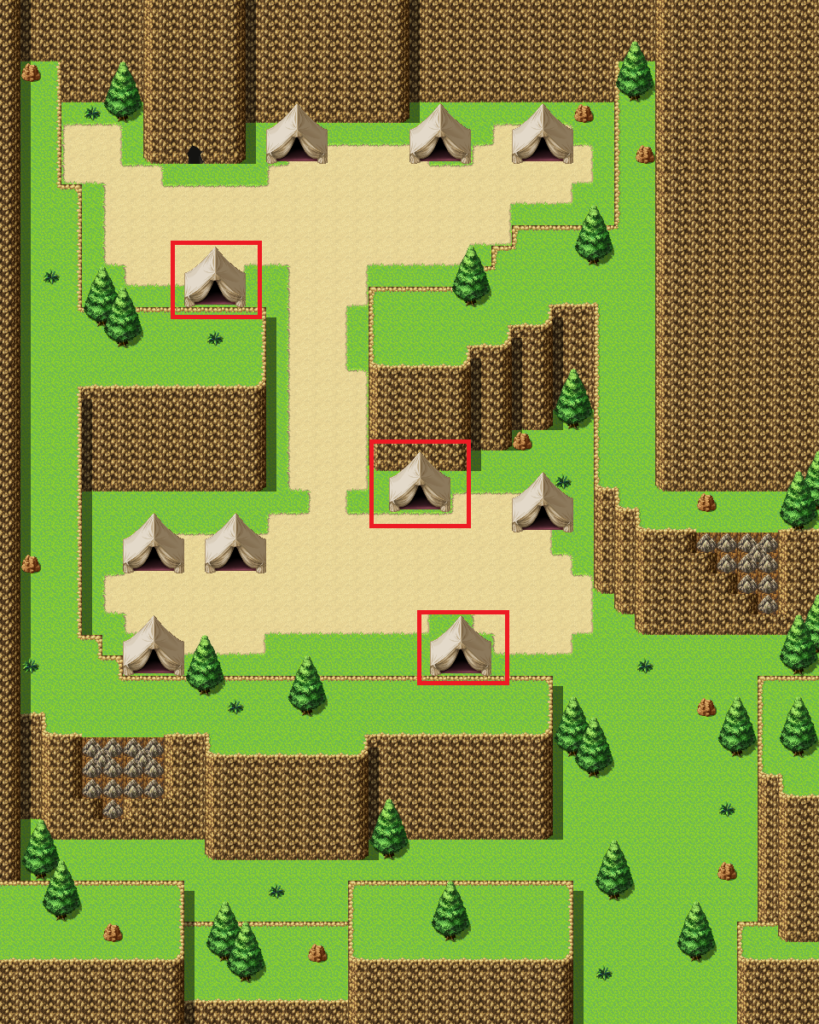
At the top of the mountain, the player finds the ogre camp with many ogres standing guard. The player can try to fight through these ogres, but will likely be overwhelmed by the high density of enemies on higher difficulties. If the player explores around and climbs up some scalable walls, he finds that he is able to knock down torches (not pictured) onto some of the tents (boxed in red above) in order to light them on fire and distract the guards. Doing so reduces the number of ogres in each encounter and places a state on them which does not allow them to attack the player until they themselves are hit by an attack, making combat much more manageable.
Once the player reaches the cave in the back of the camp, the player finds the boss of the quest, the Stone Giant (detailed below). Once the player defeats the boss, he is rewarded with some loot, and the key item, the “Blasting Powder Pouch,” the leftover explosives that the main antagonists gave the ogres. The player can use this item to destroy some weak rocks throughout the world to gain access to extra treasure.
Enemies:
Bone Club Grunt – The Bone Club Grunt’s main method of fighting is to swing wildly, getting faster and fiercer each time. Thus, its main attack, Momentum Strike levels 1-5, lock the grunt into spamming the move, but each time it attacks, the subsequent attack becomes more powerful. It starts at level 1, then the next attack is level 2, and so on. In order to fight these grunts, the player needs to make sure keep the taunt skill up on the warrior, and interrupt the grunts with stuns or blinds before their attacks become too overwhelmingly powerful.
Bone Club Battle Matron – The Bone Club Battle Matron uses a spell to increase their critical hit rates, then multi-hitting moves to fish for critical hits. Although they take some time to set up, they are usually able to do so as the player needs to deal with the more immediate threat of the grunts first.
Bone Club Pack Leader – Bone Club Pack Leaders hinder the player’s physical skill combos on the grunts by occasionally throwing out a taunt skill. Additionally, they can do some light AoE physical damage, and use “Crushing Blow,” which has a chance to reduce the target’s physical defense, potentially endangering the tank if the grunts are not properly controlled. The leaders are not an immediate threat, but they are able to mix up encounters a bit and add a bit more chaos to the fight by countering simple tanking strategies without crowd control.
Boss – Stone Giant:
At the start of the fight, the Stone Giant is accompanied by two Bone Club Battle Matrons.
As one might expect, the Stone Giant is able to dish out heavy physical damage and has high physical defense. In order to be successful, the player should allocate the warrior’s turns to taunts and defensive buffs, with only occasional attacks. Like the Bone Club Pack Leaders, the Stone Giant can also apply a physical defense debuff with a “Crushing Blow.” Therefore, the player needs to be keenly aware of the tank’s status at all times. As the Stone Giant occasionally uses “Fierce Shout” to decrease the player party’s strength, physical damage is trivialized further in this fight. Therefore, the other party members need to balance dealing magical damage to the boss, and healing both the heavy damage on the tank, and the light AoE damage the boss occasionally deals by using an “Arm Sweep,” or “Seeking Stone,” a skill which deals light damage and ignores taunts. The Stone Giant is also able to stun its attack targets, which need to be dispelled right away, or the tank needs to maintain its stun immunity skill at all times.
Hard Mode Additions – Aside from the damage differences inherent in the game’s hard mode (all player stats reduced), this fight has a few hard mode additions.
Like all hard mode bosses, this fight has a turn limit. If the player exceeds 25 turns, the boss casts “Malicious Release” and gains an absurdly high stat buff designed to wipe the player in a turn or two.
The Stone Giant’s “Stunning Bash” has an increased chance to stun the target, making the tank’s stun immunity skill fairly mandatory.
When the Stone Giant uses “Fierce Shout,” rocks will fall from the cave ceiling and have a chance to hit the party members.